
Room guides
AI Bathroom Remodel from a Photo: A Step-by-Step Guide
Use one bathroom photo to compare teal-and-oak and aubergine-and-walnut finishes, review the details and build a sample shortlist.
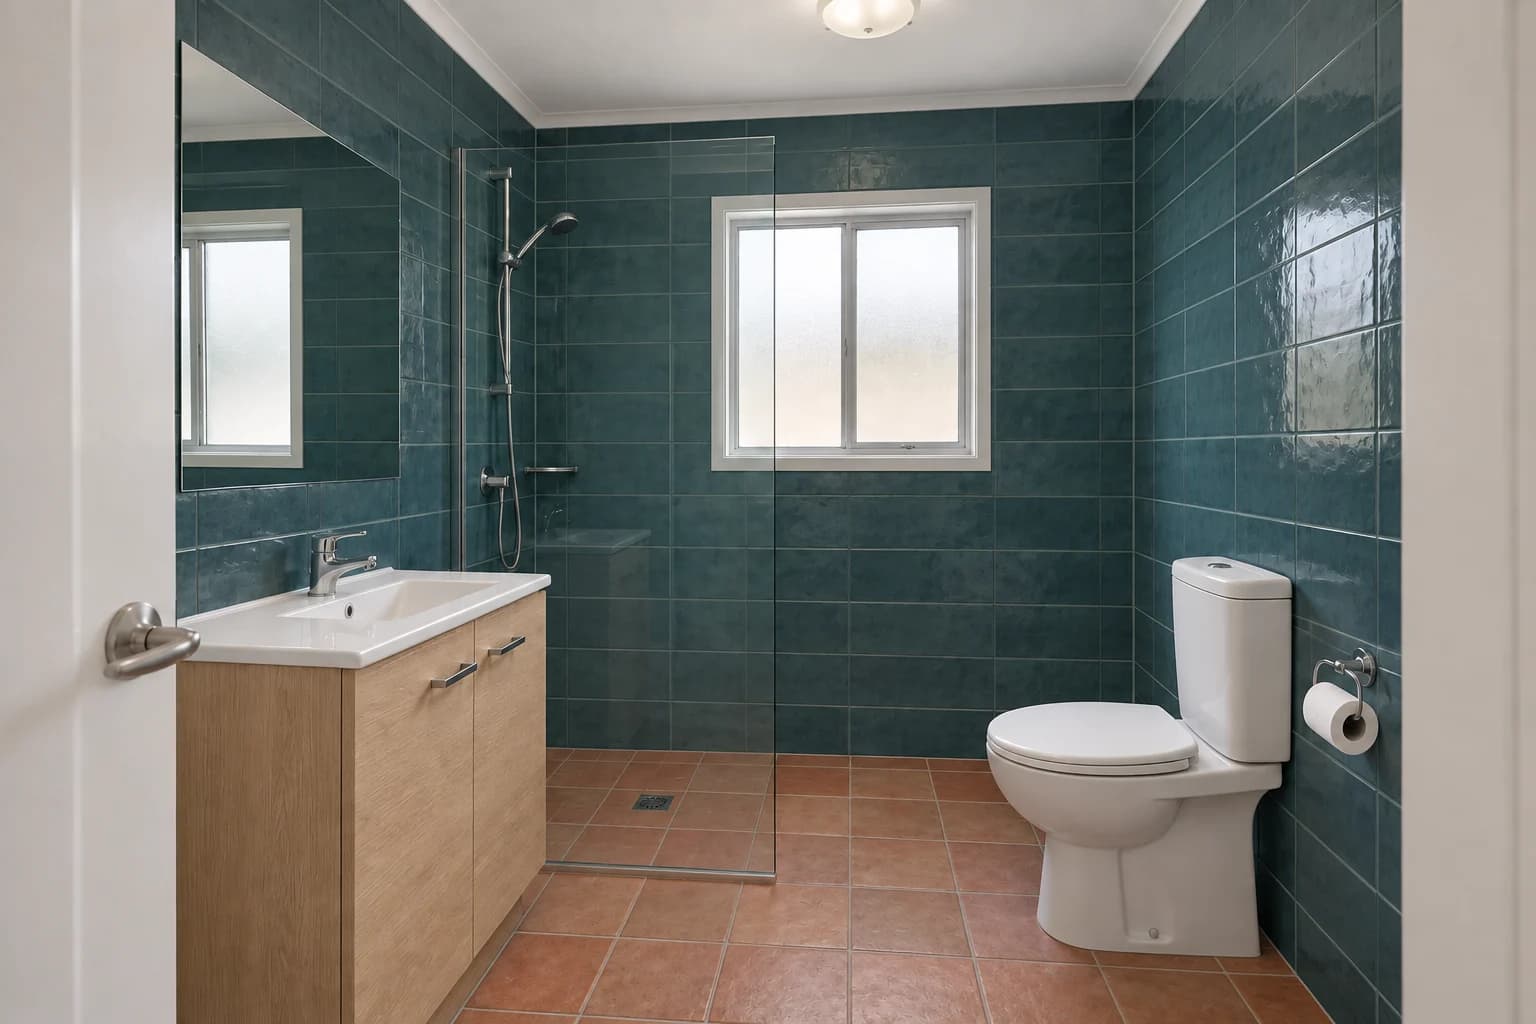
A bathroom remodel often begins with a difficult visual question: will those tiles work with the vanity and floor in a room this size? An AI bathroom concept can help you compare that combination before you collect samples. Start with one clear photo, retain the fixed features and explore a small number of finish palettes.
This guide takes one bathroom through two different directions. The goal is a clear material brief for the next step, with enough attention to the original room that an attractive image does not distract you from what can actually stay.
1. Photograph the fixed parts of the bathroom
Use a view that shows the basin, toilet, shower or bath, and at least one clear wall-to-floor junction. A doorway view can work well in a compact bathroom, provided the door does not hide the vanity. Keep the phone level and avoid an ultra-wide view that makes fixtures at the edges look stretched. Reflections in mirrors can confuse the room, so check that the main layout is readable without relying on the reflection.
Turn on the room lights if needed, but avoid a strong mix of colored light and daylight. Wipe the lens and remove towels or bottles that hide the tile field you want to change. You do not need to make the bathroom look like a showroom. You need an image that explains the surfaces and the boundaries of the space.
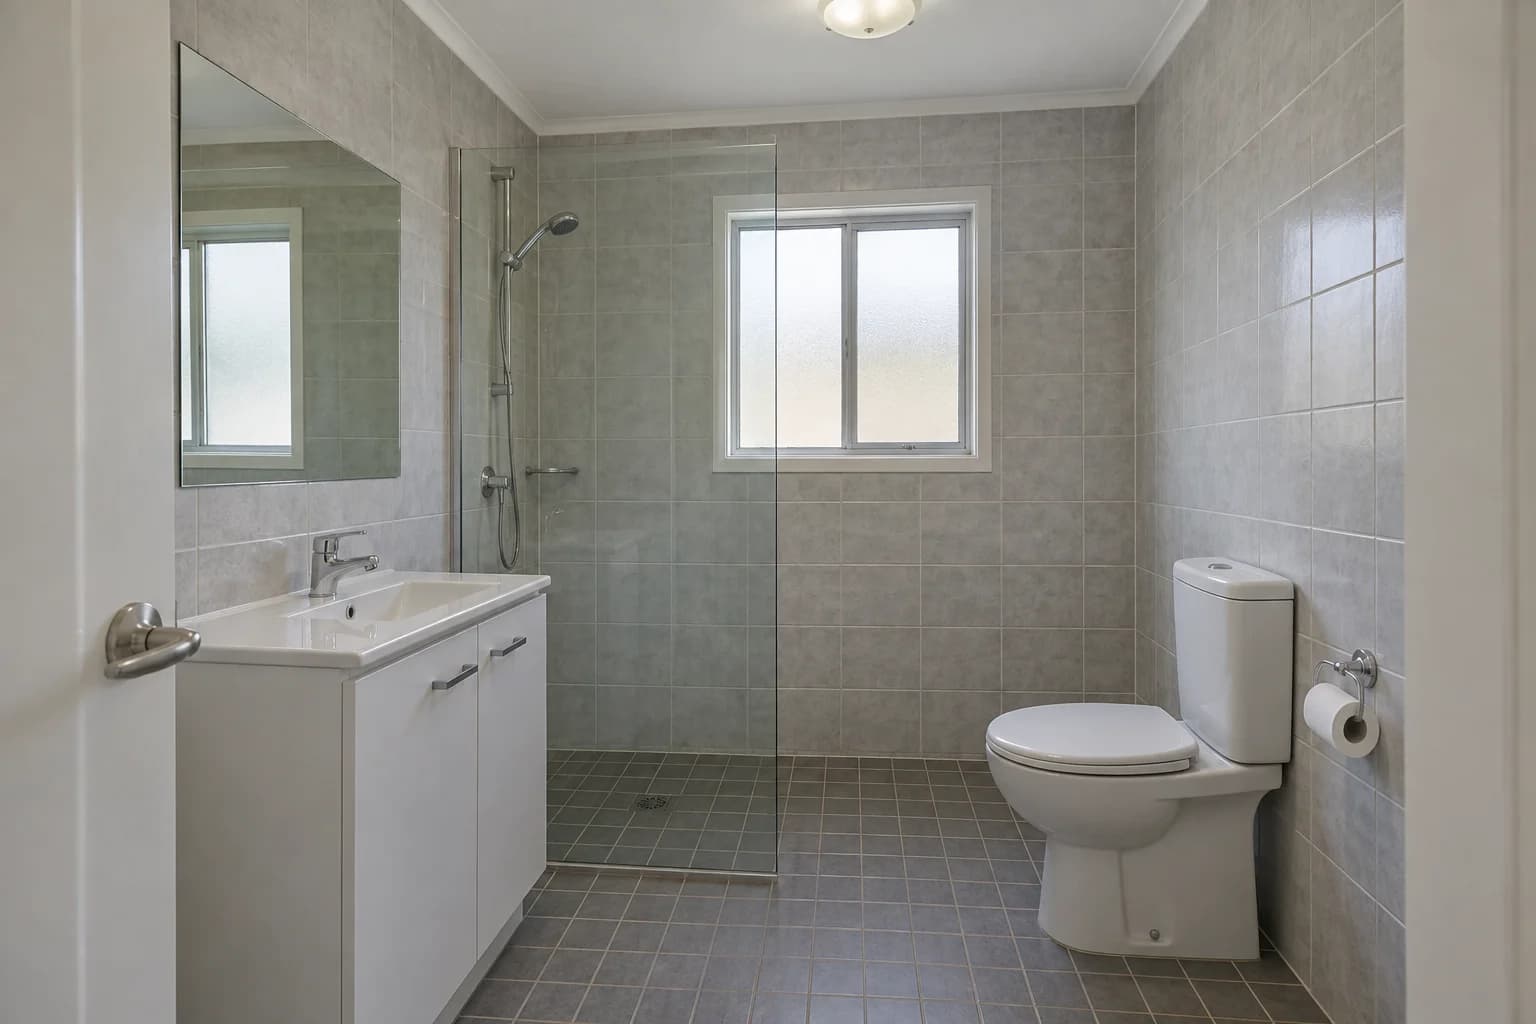
Our reference shows a white vanity on the left, a glazed shower at the rear, a frosted window and a toilet on the right. These positions define the comparison. Both finish concepts start from this image, rather than generating the second option from the first.
2. Separate finish choices from layout work
Write two lists before describing a new look. The first contains what must stay: the window, sanitaryware positions, shower screen and camera view. The second contains the surfaces you are exploring: wall tile, floor tile and vanity fronts. This division gives the model a focused request and gives you a way to judge the result.
A finish image can help you choose between a cooler teal-and-oak direction and a warmer aubergine-and-walnut direction. It cannot verify the plumbing, waterproofing, drainage or clearances behind that appearance. Keep those decisions with the measured design and the people specifying the work. If you are considering moving a fixture, record that as a separate layout question rather than treating a plausible image as proof.
Decide which material will carry the strongest color. In a small bathroom, a deep wall tile already covers much of the image. A quieter floor can balance it, while a contrasting floor makes the palette more expressive. Choose deliberately so you are comparing two coherent directions instead of combining every material you like.
| Decision | What the image helps you compare | What to verify separately |
|---|---|---|
| Tile and vanity palette | Warm or cool colors, light and dark surfaces | Real samples under bathroom lighting |
| Floor finish | Color and pattern beside the wall tile | Product suitability and installation requirements |
| Fixture arrangement | Whether the source remains recognizable | Actual dimensions, clearances and services |
| Material junctions | Contrast at the basin, vanity and tile | Product dimensions, trims and construction details |
3. Try teal tile, terracotta and oak
The first concept puts teal on the walls, terracotta on the floor and oak on the vanity. The white basin and toilet remain bright points against the deeper color. Warm timber and clay-colored flooring stop the teal from making every surface cool. This is a useful direction if you want the bathroom to feel colorful while retaining familiar white sanitaryware.
Look at the wall beside the toilet and the wall behind the shower. The same teal appears different in direct reflection and in softer light. That variation is part of the visual effect, but the image cannot establish the sheen of a particular tile. The model also makes the wall tiles larger-looking and gives the vanity a different front treatment. Record those changes before deciding what you actually want to specify.
If you like the walls but the terracotta feels too warm, keep this concept as a parent and change only the floor in the next request. You will learn more from that controlled revision than from replacing the walls, vanity and fittings at the same time.
4. Compare aubergine tile and dark walnut
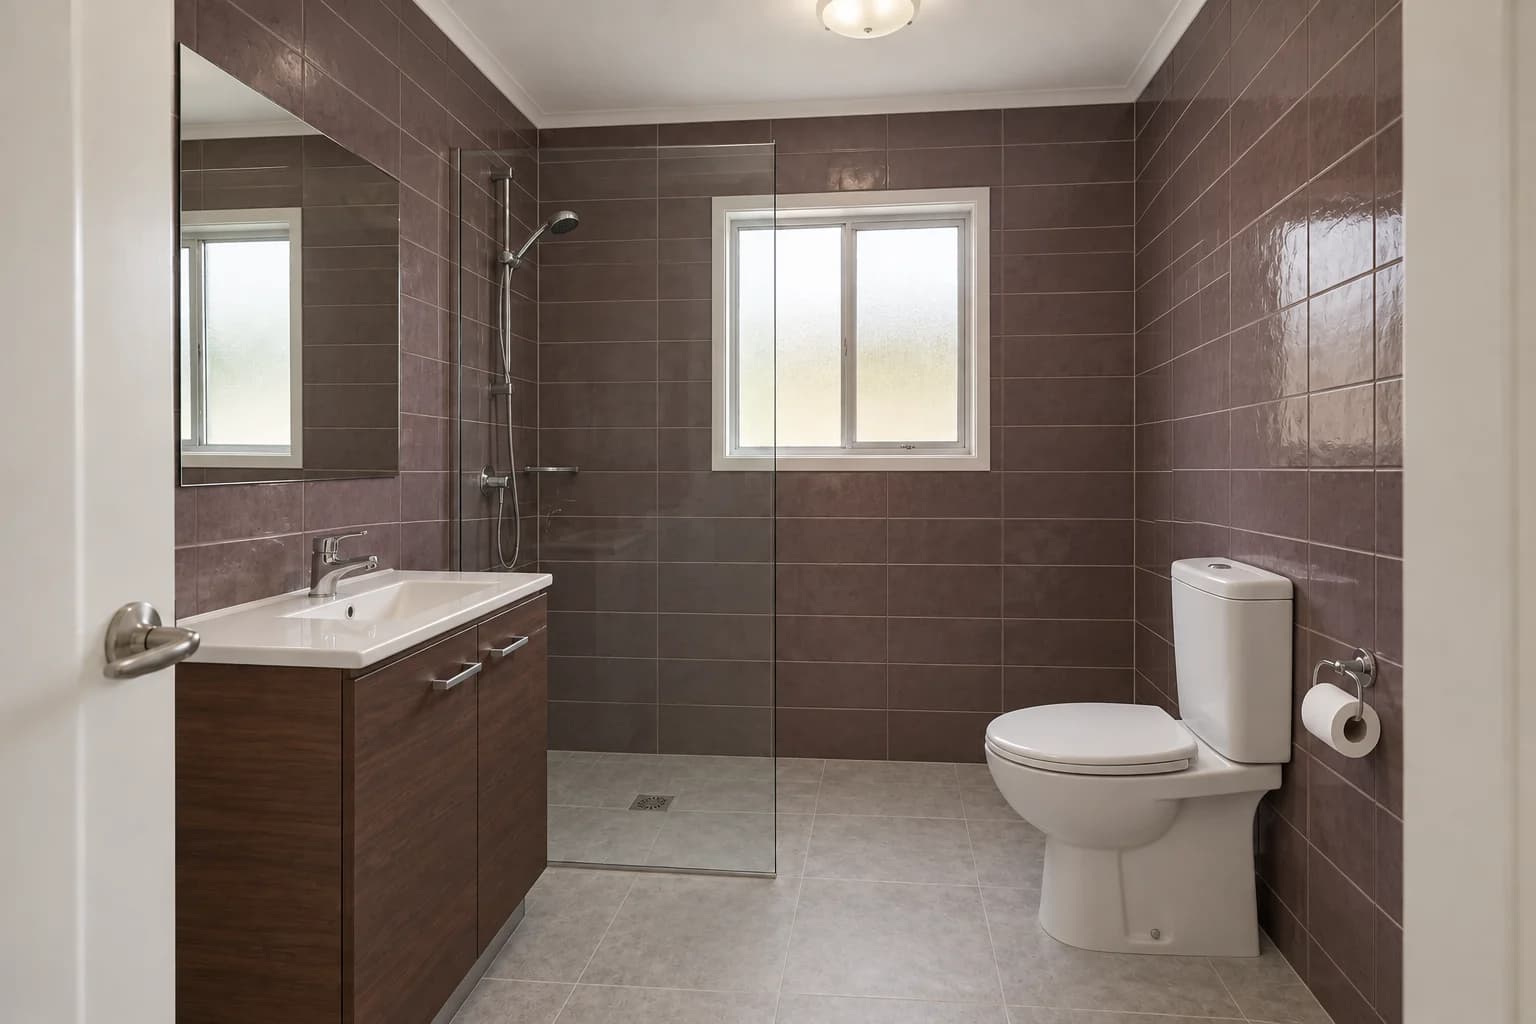
The second concept combines muted aubergine walls with a lighter grey floor and dark walnut vanity. Compared with the teal version, the warmer wall color and darker timber create a different relationship around the basin. The light floor gives the lower part of the room a quieter background. You can compare that overall balance without changing the toilet or shower position.
The result reads as a subdued plum-brown rather than a vivid purple. That is worth noticing: a color name can produce a range of interpretations. If your intention is a richer aubergine, describe the hue and saturation more directly in a follow-up. Do not keep generating new style labels when the actual issue is simply that the wall color is too muted.
Compare both versions at the same size and return to the original between them. Ask whether you prefer the wall color, the floor brightness or the vanity contrast. Those are three separate observations. You may prefer the teal walls with the lighter floor; that is a clear next experiment rather than a reason to restart the entire process.
5. Review the material junctions
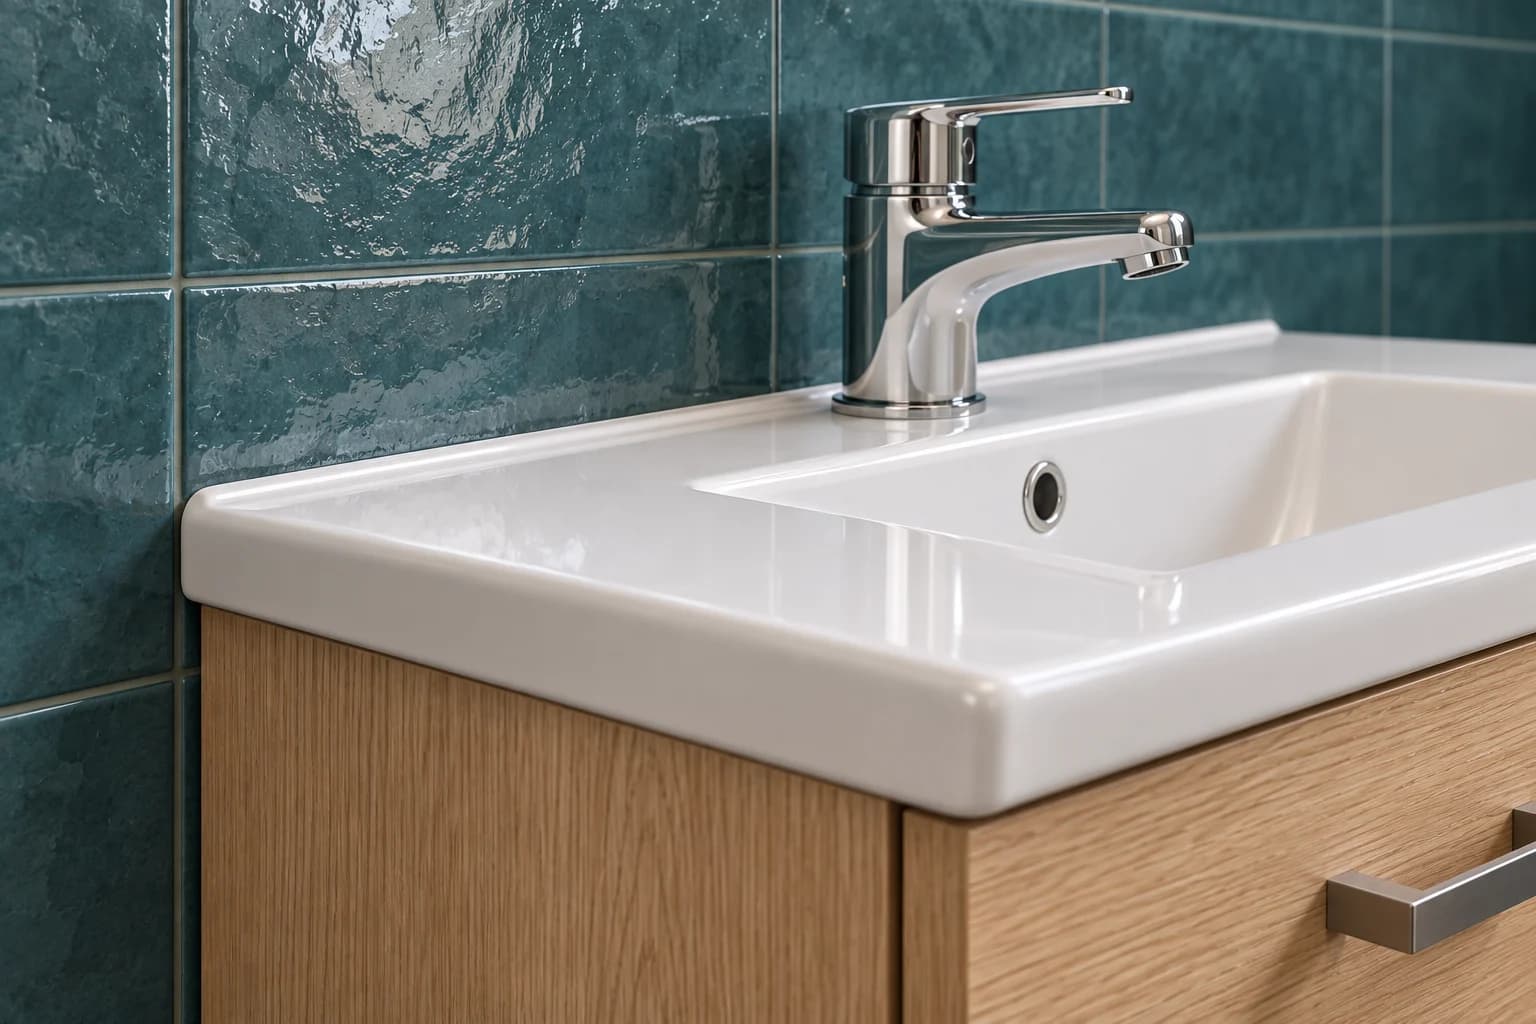
The whole-room view helps you choose a palette. A closer material view helps you discuss where the choices meet: the basin against the wall, the vanity front below it and the chrome fitting above. In the teal direction, these surfaces create three distinct textures instead of relying on color alone.
The detail below is an AI-generated material study based on that concept. Use it to discuss the contrast between ceramic, timber and white sanitaryware. It is not a measured detail of the basin edge or a tile-setting plan. Exact joints, trims, seals and product dimensions need to be resolved using the actual products.
Look back at the full room after studying the detail. An attractive close-up can make a busy surface seem more appealing than it feels across four walls. If the texture dominates at room scale, test a quieter tile finish while retaining the palette you already selected.
6. Make a practical finish shortlist
Save the selected image with a short note: retain fixture positions; investigate teal wall tile; compare a pale floor with terracotta; keep chrome fittings. This note is more useful than a folder of unlabeled pictures. It tells a supplier or designer what the concept is meant to communicate and what remains undecided.
Bring one preferred palette and one alternative to the sample stage. For the teal direction, that might mean keeping the wall tile idea while comparing the terracotta floor with a pale grey option. Give each sample a role instead of collecting unrelated finishes: main wall color, supporting floor and vanity contrast. If one available product changes the balance, revisit that relationship before adding more materials. Photograph the samples together for your notes, but make the decision while looking at them in the room. This keeps the shortlist manageable and makes it clear which part of the concept you are trying to preserve.
Collect real samples for the wall tile, floor finish and vanity. View them together upright and flat as they will appear in the bathroom. Check them under your bathroom lighting, especially if the room has little daylight. A sample viewed in a bright showroom can feel quite different beside your existing white basin.
Ask the supplier and installer to confirm suitability for the intended location and the details of the installation. The visualization does not establish a floor product’s slip performance, a wall product’s suitability for a wet area or the construction behind the tile. Keep the visual shortlist and the technical specification connected, but do not treat them as interchangeable.
Questions about AI bathroom remodeling
Can I keep the bathroom layout?
You can ask to retain the fixture positions and review the output against the source. There is no guarantee of exact preservation. Reject a result that moves the window or changes the shower footprint if those are fixed conditions.
Should I choose wall tiles or floor tiles first?
Start with the surface that carries your main design idea. In these examples that is the colored wall tile. Compare two floor directions around it once the wall palette feels right.
Can the image tell me how many tiles to order?
No. Take quantities from measured surfaces, the chosen tile format and an installation plan. Generated tile lines are not a reliable counting grid.
What if the bathroom becomes bigger in the result?
Return to the reference and narrow the brief to the finishes. Keep the window and fixture positions explicit. A larger-looking room may be attractive, but it does not answer a finish-only comparison.